
There's not much point in an interactive rendering sytem if you can't actually change anything. Here we implement simple camera interaction which allows us to dolly the camera forwards and back using the mouse.
State
Of course we require new state.
const state = {
  server: {
    host: 'localhost',
    port: 8080,
    secure: false
  },
  scene_filename: 'scenes/meyemii.mi',
  scene_name: 'meyemii',
  app_scope_name: 'tutorial',
  session_scope_name: `scope_${RS.Utils.create_random_string(8)}`,
  render_loop_name: `render_loop_${RS.Utils.create_random_string(8)}`,
  last_mouse: { x: 0, y: 0 }
};
OK, it's not that much. Just somewhere to record the last mouse location so we can track movement.
Camera initialization
To move the camera we first need to know where it is. The scene info has already given us the name of the camera instance. So all we need to do is ask for the camera matrix in the scene_loaded function:
 const [ camera_matrix, start_result ] = await service.queue_commands()
  // create a scope for the session
  .queue(new RS.Command('create_scope',
    {
      scope_name: state.session_scope_name,
      parent_scope: state.app_scope_name
    }))
  .queue(new RS.Command('use_scope', { scope_name: state.session_scope_name }))
  // localize the camera to the session scope
  .queue(new RS.Command('localize_element', { element_name: state.scene.camera }))
  .queue(new RS.Command('localize_element', { element_name: state.scene.camera_instance }))
  // set the camera resolution to match the size of the Image element we will display in
  .queue(new RS.Command('camera_set_resolution',
    {
      camera_name: state.scene.camera,
      resolution: { x: img.width, y: img.height }
    }))
  .queue(new RS.Command('camera_set_aspect',
    {
      camera_name: state.scene.camera,
      aspect: img.width / img.height
    }))
  .queue(new RS.Command('instance_get_world_to_obj',
    {
      instance_name: state.scene.camera_instance
    }), true)
  // start the render loop
  .queue(new RS.Command('render_loop_start',
    {
      scene_name: state.scene_name,
      render_loop_name: state.render_loop_name,
      render_loop_handler_name: 'default',
      timeout: 10,
    }), true) // want a response for this command
  .execute();

if (camera_matrix instanceof RS.Command_error) {
  set_status(`Unable to get camera matrix: ${camera_matrix.message}`);
  return;
}
if (start_result instanceof RS.Command_error) {
  set_status(`Render loop start error: ${start_result.message}`);
  return;
}

set_status('Starting render loop stream');

state.camera_matrix = camera_matrix;
We've inserted 2 new commands here. Since we're going to be editing the camera instance, and we don't want other users to see our changes, we localize the camera instance to the session scope. Then, after setting the camera resolution, we call instance_get_world_to_obj to fetch the matrix used to position the camera. Since we want a result from this command we add the true argument to the queue call and add a variable to receive the result to the array destructuring.
After execution we check for errors in the result and store the camera matrix in the state.
Instances and matrices
You will notice that we're actually dealing with two distinct scene elements here to manipulate the camera. We are referencing a camera to set the resolution but there is also a camera instance from which we get it's matrix. RealityServer® separates out an elements definition and it's location in the scene into two separate elements. The first defines the scene element. For a camera this is the resolution, field of view, tonemapping, depth of field etc. For a mesh it defines the polygons or triangles that represent the object; lights contain the light type and MDL material that defines the emission properties. Basically everything except for where the element is in 3D space. To actually use a scene element an instance needs to be created that references it, then we set it's orientation matrix and insert it into the scene. This decoupling of element properties and location allows for many interesting features, not the least of which is instancing where the same object can be placed into the scene multiple times in different locations (and even with different materials) without having to redefine the entire object.
However this does mean that we need two elements to represent any item in the scene. The instance is what is directly available from within the scene graph, from that we can then obtain the element. For convenience the import_scene command returns both the camera instance and the camera element itself since we usually want to start working with both straight away.
Instance matrices are row major, homogenous world to object transforms. This is the reverse to what many users may be used to seeing where matrices define how to transform an object to it's final location in the world. The reason for this is purely efficiency, internally RealityServer® requires world to object transforms for rendering so it makes more sense for them to be provided in the final format that is needed. It also means that inspecting the matrices can be confusing as the location row does not simply have the object's location as clear numbers. It is necessary to invert and extract the values from the matrix. However for this tutorial this is not required.
Mouse interaction
We want the user to be able to drag the mouse on the image to move the camera back and forward. We start the operation by registering a mouse down handler on the image after the render stream has started.
set_status('Render loop stream started');

img.addEventListener('mousedown', mouse_down);
mouse_down and it's associated functions are defined as follows:
function mouse_down(event) {
  state.last_mouse.x = event.clientX;
  state.last_mouse.y = event.clientY;

  window.addEventListener('mousemove', mouse_move);
  window.addEventListener('mouseup', mouse_up);

  event.preventDefault();
}

function mouse_move(event) {
  // update state
  state.last_mouse.x = event.clientX;
  state.last_mouse.y = event.clientY;

  event.preventDefault();
}

function mouse_up(event) {
  window.removeEventListener('mousemove', mouse_move);
  window.removeEventListener('mouseup', mouse_up);

  event.preventDefault();
}
This is a fairly standard mouse interaction pattern. On mouse down we record the current mouse location and register move and up handlers on the window. This is done on the window so that if the mouse is moved outside of the image these handlers are still called. On move we update the mouse location and on up we remove the window listeners.
To move the actual camera we add code to mouse_move to update the camera instance transform.
function mouse_move(event) {
  const new_wz = state.camera_matrix.wz - (event.clientY - state.last_mouse.y) * 0.001;
  if (new_wz > -0.735 && new_wz < -0.072) {
    state.camera_matrix.wz = new_wz;
    state.stream.update_camera(
      {
        camera_instance: {
          name: state.scene.camera_instance,
          transform: state.camera_matrix
        }
      }
    );
  }

  // update state
  state.last_mouse.x = event.clientX;
  state.last_mouse.y = event.clientY;

  event.preventDefault();
}
const new_wz = state.camera_matrix.wz - (event.clientY - state.last_mouse.y) * 0.001;
Here we calculate the new wz component of the camera instance matrix. Conceptually, the wz component represents how far back the camera has moved from it's initial position along it's view direction. So to dolly the camera backwards or forwards we simply need to add or subtract a value from that component. We calculate how far the mouse has moved, scale it appropriately for the scene size then subtract from wz to work out the new component value.
if (new_wz > -0.735 && new_wz < -0.072) {
  state.camera_matrix.wz = new_wz;
  state.stream.update_camera(
    {
      camera_instance: {
        name: state.scene.camera_instance,
        transform: state.camera_matrix
      }
    }
  );
}
The if statement is simply a sanity check. The sample meyemii scene is actually quite small (the object itself is only a few centimeters wide) and the room only about 1 meter square. These limits prevent us from moving the camera outside of the room or into the object.
After updating the wz component of our local camera with the new value we call the RS.Stream#update_camera function on the stream. This is a convenience function for moving the camera and changing it's properties on a particular stream. While you could call commands directly to update the camera this would result in a camera change being made for every mouse move. update_camera has the advantage that it only applies a single update between render loop calls on the server, and also automatically makes the changes in the render loop scope. As well as updating the camera transform update_camera can modify many other camera properties and is the prefered way of manipulating cameras.
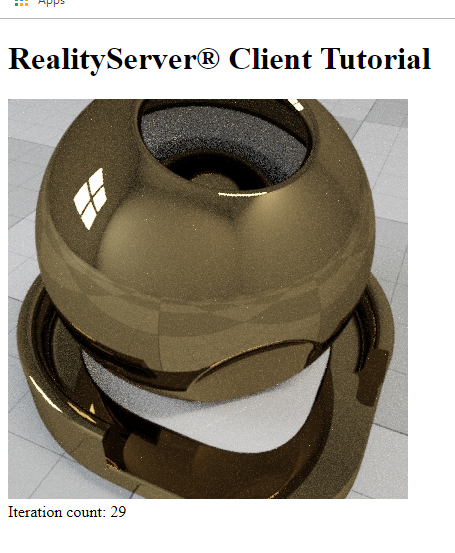
Now load your page, drag up on the image and you should get something like the following:
Summary
In this tutorial we have learnt about instances and matrices and how to move the camera. In the next tutorial we will make some material changes to the scene.
Source
The complete source for this tutorial can be found below:
If you have a local checkout and a running RealityServer® you can load the tutorial below:
| <<< Rendering | Changing Color >>> |